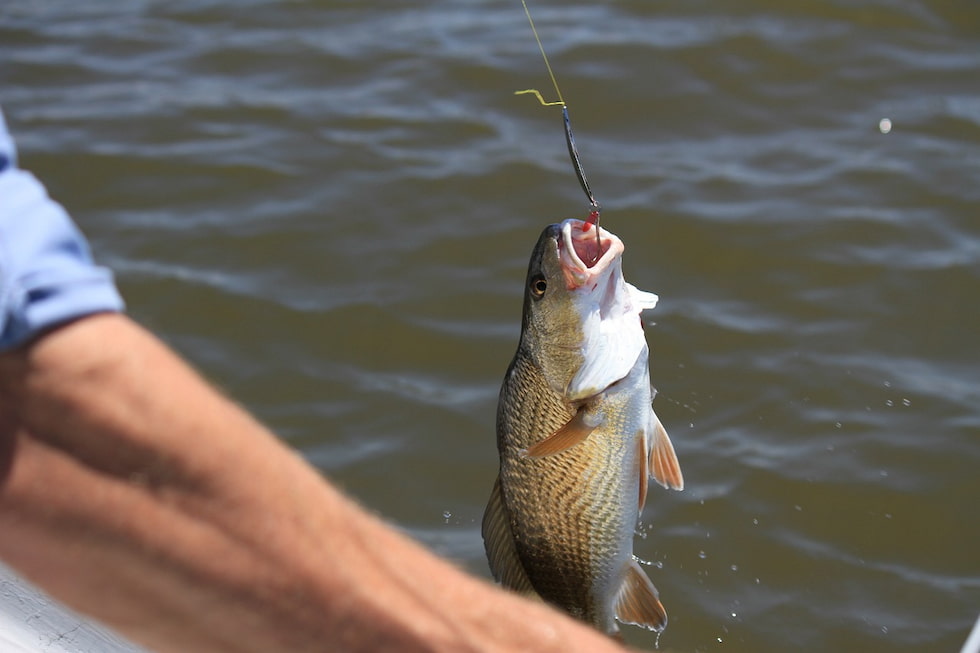
A novice fisherman will only be equipped with an understanding of an overhand knot when they enter the water. A real angler wouldn’t dare venture out with such a limited arsenal.
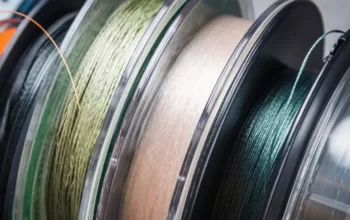
Different knots are required for different circumstances. The knots required to connect two sections of line together are distinct from those required to tie fishing line to a hook.
How to tie fishing hook? These fishing knots include Clinch Knot, Palomar Knot, Dropper Loop, Turle Knot , The Hangman’s Knot, Uni Knot …
Before you get on the water, learn these knots to be ready for anything.
Keep reading.
Table of Contents
The Significance Of Learning How To Tie Fishing Hooks
Knowing these top fishing knots will give you a distinct advantage when you’re ready to take to the stunning waters of Ponce Inlet. With a properly tied fishing hook, you will:
- Reel in big fish
- Hook fish correctly
- Lose fewer hooks
- Experience less frustration while on the water
How To Tie Fishing Hook?
Clinch Knot
Most anglers will mention the Clinch Knot as one of the first knots that come to mind when asked how to tie a fish hook. Being relatively simple to tie, it is most likely the most widely used knot for tying a fish hook. The improved Clinch Knot has been time-tested to produce a knot that is strong against large fish. The loose end of the line must be wrapped around the line five or six times before being threaded through the loop at the eye of the hook to form this knot.
Though not everyone concurs, the Improved Clinch Knot is undoubtedly improved. When using smaller gauged hooks, some anglers still favor the traditional Clinch Knot.
Palomar Knot
Another well-liked knot for tying fish hooks is the palomar knot, which has some distinct advantages when used with braided line. The Palomar knot is one of the strongest knots for tying a fish hook, and with practice, you can even tie it in the dark, according to the majority of anglers. To tie a Palomar knot, double your line to form a loop. Next, tie an overhand knot. In order to tighten, pass the loop over the hook’s tip.
The Dropper Loop
Despite the fact that jigging (a sinker/hook combination) or bait fishing are the main uses for the Dropper Loop, it is always a good option. This one requires caution because too many loops in the line could twist it.
- Step 1: Holding one side, create a loop and wrap the tag end at least six times around the fishing line. (Keep the area where you’re making the twists open.)
- Step 2: Take the original loop and put it through the opening in the middle
- 3. Pull both ends firmly in opposition to one another until the turns begin to coil.
(The loop is going to be parallel to the line.)
Turle Knot
The Turle Knot is an alternative and works best when using a small hook and delicate line for fishing. It is also a well-liked fly-fishing knot. To tie the Turle Knot, thread the line through the eye of your hook or fly, tie a loose overhand knot, and then pass the loop over the end of the hook.
The Hangman’s Knot
This is one that you should definitely know how to tie if you’re just getting started. One of the simplest knots, the Uni Knot (Hangman Knot), has numerous applications. When making a reservation with Ponce Inlet Watersports for a charter fishing trip, you might want to use it.
- Step 1: Bring the line’s tag end to the standing line and push it through the eye. Over the doubled line, lay the tag end to form a loop.
- Step 2: Pass the line underneath the loop and wrap the doubled line about eight times using the working end.
- Step 3: Wet the lines and tighten the end by pulling it. (You can either remove the tiny loop or slide it all the way down to the eye.)
Uni Knot
The preferred knot for tying monofilament line to your hook is the uni knot. This knot allows for an even and straight pull because it is a Snell Knot. The strength of the fishing line is said to be reliably maintained by the uni knot. The Uni Knot is formed by wrapping a loop 5–10 times around the hook. Pull the line up until the loop is snug.

Double Uni Knot
A third way to firmly connect two lines together is the Double Uni Knot, which is an improved version of the Hangman or Uni Knot.
- Making a loop over the double line on each side, step one is to overlap the ends of both lines.
- Step 2: Wrap both tag ends around both lines on their respective sides three to four times, passing each time inside the loop.
- Step 3: At this point, you should have tied two uni knots.
- Step 4: To join the two knots, gradually tighten the standing lines.
Surgeons Knot
The Surgeon’s Knot, also called the Double Surgeon’s Loop, is what we have. This knot can be utilized to join two pieces of line together, just like the Blood Knot. A loop at the end of a line can also be made using it. This knot makes a strong, dependable loop at the end of your line, making it a great one for anglers to learn. Start by doubling the line and tying an overhand knot before attempting the Surgeon’s Knot. Then, tighten the knot by re-passing the same loop through the opening.
Double Surgeon’s Loop
The Double Surgeon’s Loop Knot is the ultimate knot. With this fishing knot, you can be sure that the loop at the end of your leader will be sturdy.
- Step 1: Fold the end of your line over to form the desired size of a loop.
- Step 2: Make a single overhand knot, leaving the top untied so you can loop the loop through it once more.
- Hold the line and the loop in step three. Till the knot feels snug, pull them.
Blood Knot
The Blood Knot is actually not for tying your line to a fish hook, unlike the earlier knots. The Blood Knot joins two strands of fishing line together instead. If you want to join a pre-strung fish hook to a longer line or repair a broken fishing line, you can use this knot. Beginning with 5-7 wraps of your first piece of line around your second piece of line, tie a blood knot. Next, 5-7 times, wrap the second piece around the first piece. To complete, tighten the middle of the two loose ends.
The Stopper Knot
This knot is the one you should use if you intend to use slip bobbers. Depending on the depth at which you’re fishing, you should tie the Stopper Knot just above the bobber.
- First, estimate the length of line at around 0.5 feet.
- Step 2: The stopper should be tied perpendicular to the line. By going backwards twice, you can make a loop with the line.
- Step 3: Pass the line through the open loop three to four times while wrapping it around the two lines.
- Step 4: Tighten it by pulling on both ends.
Snelling A Hook
This knot will make it easier for you to attach monofilament to a hook. The line should first be threaded twice through the hook’s eye to create a loop that hangs next to the hook. Pull the line up so that the loop is snugly positioned beneath the coils. To create tight coils, wrap the loop around the hook 5–10 times. Then, secure the coils with your finger.
Knotless Knot
Its name comes from the fact that it isn’t really a knot. For fishing for carp, a common knot is the knotless knot. A loop is tied at the end of your line to begin. Place bait on your line before threading the other end of your line through the hook and adjusting where you want the loop to be. Now double back on your line and neatly coil it seven to eight times around the shank of your hook. Afterward, pass your line through the hook’s eye, secure the loop, and tighten the other end by pulling. This is comparable to the snelling knot, as you will see, but it lets you leave a hair hanging out at the end.
Critical Tips For Any Fishing Knot
There are a few things to keep in mind regardless of the fishing knot you choose.
- Follow the instructions exactly for the chosen knot type
- Always add moisture to your knot before tightening it completely
- Hold the fish hook carefully and be mindful of the hook eye
- Trim excess line after the knot is tied
- Practice makes perfect
Which Knot Is Best To Use?
It is helpful to know when you can and should use each fishing knot in addition to having a variety of knots at your disposal. Knowing your knots inside and out can make you a better angler because different knots have different uses. Many people use the improved clinch knot as their default method, but there are times when you’ll want to use another technique.
The palomar knot is probably your best option if you want a sturdy knot. It’s a simple knot that serves a number of functions. It’s a great option if you want a strong knot because it doesn’t involve a lot of twisting and bending, which could expose vulnerable areas of your line. Use a palomar knot to prevent breaks, but make sure to fully tighten it for maximum effectiveness. The knot must be placed on the hook’s eye, not its shank.
You can improve as an angler by mastering these knots for attaching your hook to your fishing line.