You must clean your recently caught trout before you can eat it. “A fisherman’s term for removing the entrails and other undesirable parts of a fish is “cleaning.” Moreover, it prevents fish that has been stored from going bad. Slit the belly of your trout and remove the gills before cleaning it. Pull the head, fins, and entrails free of the fish or cut them off to remove them. Fish should be skinned and fileted so that the meat is prepared for cooking and has been deboned.
Table of Contents
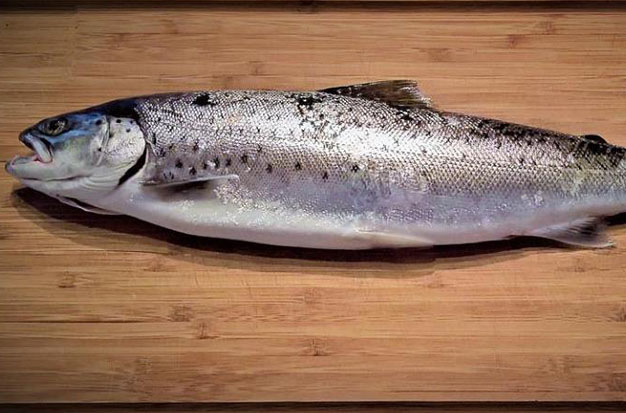
How To Clean A Trout?
You can get the freshest meat possible by cleaning trout as soon as you catch them. Out of the water and in the heat, trout start to deteriorate quickly. The internal organs and digestive juices are what cause this decomposition. Almost immediately after death, these animal parts start to decompose. Thankfully, once you get the hang of it, cleaning trout is not that challenging. They are easy and quickly cleanable after you remove them from the water. From there, it can simply be placed in the pan. After cleaning the fish, it’s best to start cooking as soon as possible.
You’ll need to have a few tools on hand to get started. If you are going to clean the fish, pack the following items with your fishing equipment in advance:
- A sharp filet knife
- Paper towels
- A frying pan. Cast iron is often best
- Olive Oil or butter
- Seasonings like salt, pepper, and lemon slices
- Utensils like plates, knives, and forks
If you’re going to clean the fish, make sure the area is spotless and level. It’s only a safety issue here. The back of your car might work if you don’t have a table on hand. Once you get the hang of it, cleaning a trout is simple and effective.
Step 1: Using a sharp fillet knife, insert the point into the *** opening.
Step 2: Cut a straight slit through the middle of the trout’s belly. Just cutting through the skin is sufficient; avoid making deep cuts. Don’t cut the internal organs any more than is absolutely necessary.
Step 3: Before you reach the v-shaped point below the fish’s jaws, stop cutting up to the gills.
Step 4: The v-shaped tab on the underside of the fish’s lower jaw can be extended by placing a finger inside the mouth of the fish and pressing down on the tongue. This tab is thin on either side and thick in the center. Cut the thin section with the knife, going from one side to the other, to release the v-shaped tab.
Step 5: With your thumb and forefinger, hold the trout’s lower jaw in one hand, and with the other, take hold of the v-shaped tab you just freed. Pull this piece down.
Step 6: With one pull, the entire gill structure and entrails will be removed as you slowly and steadily pull downward.
Step 7: Holding the trout in one hand and running the thumbnail of the other hand up the length of the backbone will allow you to remove the final dark-colored blood sac.
Step 8: Use paper towels to dry the fish, clean ferns, or a water rinse. If you use water, make sure to use paper towels to pat the fish dry. Clean
Step 9: Place in a creel or cooler.
Step 10: Or even better, dive right into a hot frying pan with butter and lemon juice!
How Do You Skin And Filet A Trout?
You don’t have to skin a trout before cooking it, unlike some fish. The skin of a rainbow trout is frequently removed before frying it. It gives food a crispier texture and more flavor. However, if you’d like, you can skin the trout. It necessitates a careful touch and some patience.
Step 1: Insert your knife behind the gill line if the trout’s head is still on it. Simply reattach the head where the gills once were if the head has been removed.
Step 2: To get to the backbone, make a cut in. A little pressure, but not too much, will be needed for this. Bypassing the bone is not what you want to do. When you touch it, you will be able to feel it through the knife’s blade.
Step 3: Cut in the direction of the fish’s tail using the backbone as a guide. You should be able to complete this task with a single slice from your knife. When you reach the tail, halt.
Step 4: Then, make the same cut on the opposite side of the fish by turning it over. If the head is still attached, be sure to hold onto it firmly while performing this action. Otherwise, you’ll need to be cautious when grabbing the filet’s tip.
Step 5: Me inside the fish, open. The bones’ interiors can now be cleaned out. To remove the large rib bones, cut along the inside with the knife. The majority of the rib cage ought to come off with one pull. Later, you might need to use your fingers or tweezers to remove the smaller ones.
Step 6: Skin-side down, place the filet. Take hold of the fish by the tail. Just above the tail, slid the filet knife into the flesh. Slide the blade along the filet’s length while holding it at an angle. The flesh should serve as a guide. You should have two perfect filets if you repeat on the other side.
Additional Tips
No matter how meticulously you clean your trout, if you don’t keep it cold, it’s all for nothing. Ice is best. Keep ice and cooler handy when catching them and after cleaning them.
Moisture, especially warm moisture, is ideal for flavor-degrading bacteria to flourish. Therefore, after catching your fish, don’t leave them hanging on a stringer in the lake.
- Put your recently caught fish on ice, preferably not submerged in melted ice, to give your taste buds the true treat they deserve.
- As your fishing day goes on, even ice in a cooler starts to melt, but start out with pure ice.
- Take the fish off the ice to begin cleaning them, and after cleaning, immediately place each fish back onto fresh ice.
- You should just put your catch into a dry cooler as a stopgap if you ever run out of ice. Try to buy or get ice as soon as you can after that.
Always try to tightly wrap your fish in freezer paper rather than plastic when storing it in the freezer because the latter can cause air bubbles that invite bacteria.
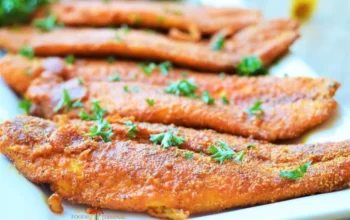
How To Cook A Trout?
One of the easiest and most delicious ways to cook your trout is by seasoning it inside and out with olive oil, salt, and lemon pepper. In a reusable squeeze bottle like HumanGear’s GoToob+ ($25 for three), I transport my oil. Spices can be packed in one-ounce Nalgene containers ($6) or pocket-sized Stasher reusable storage bags ($14 for two). A real lemon (save some for seasoning as you eat) amplifies the flavor, and butter is richer than oil for those willing to bring in more fixings. Butter should keep for a day or two at room temperature without refrigeration. Backcountry cooks with a passion for flavor can stuff the cavity of the fish with garlic, onions, dried thyme and oregano, and cayenne. Remember that cooking time will increase if you add vegetables or other ingredients to the fish.
After seasoning the fish, wrap it in aluminum foil. If your fish are less than eight to ten inches in length, you might be able to wrap them all together in one sheet; otherwise, wrap them individually. If you’re fortunate enough to be able to cook your trout over a campfire, wait until you have a good bed of coals before placing the foil-wrapped fish over them. You can also raise them above the fire to better control the cooking temperature if you have a grate or an easy-packing grill and pit set, like the UCO Flatpack ($34). Cook the fish, flipping it halfway through, for five to ten minutes (generally, eight minutes per inch of thickness, but exact times depend on the fish and your fire).
Cut the fish into manageable lengths for your pot or pan, then fry them over your camp stove if you can’t light a fire because of local regulations or fire danger. Wrapping the fish can help with cleanup even though using foil is not necessary for this situation.
When the flesh is opaque and flakes easily, the fish is ready to eat.
How To Eat A Trout?
If cooked properly, the meat should fall right off the bones, giving you much more than you would get by filleting the fish before cooking (which is frequently difficult with smaller trout anyway). Be prepared to spit out a few small bones as you carefully pull the meat off the bones in order to reduce the number that enters your mouth.
The cheeks, which are tiny scallop-like morsels that have long been prized for their rich, almost sweet flavor, are also safe to eat along with the skin and fins.
With just a rod, a few sheets of aluminum foil, a squeeze bottle of oil, and a few of your favorite spices, you can prepare a fresh, all-time backcountry meal in just 20 minutes.